Monthly Archives: November 2009

Fargo HDP5000 Has New Mac Computer Compatibility

Fargo HDP5000

Fargo HDP5000 Printer Update

Fargo is making improvements to their quality ID card printer models.

The Fargo HDP500 is now able to be used by those operating a Mac computer. Recently the enhancement to provide compatibility with the Mac OS X v10.4 and v10.5 drivers became available.

download Download the Fargo developed driver at Fargo support.

For more information about Fargo printers or the Fargo HDP5000, contact our ID experts at 888-485-4696.

Evolis Quantum – Enhanced Printer Now Available

Evolis Quantum Printer Is Now Available

Evolis Quantum

The all new Quantum has the power of a centralized printer system with the flexibility of a desktop printer.

The newest version of the Quantum, the printer to personalize cards in large quantities, is now available. Cards encoded and printed in high volume may include:

  • ID cards
  • Loyalty cards
  • Event passes
  • Student IDs
  • Transport cards
  • Calling cards
  • Banking cards

Known for it’s speed, the Evolis Quantum prints 1000+ cards per hour in monochrome and 135 cards per hour in full color. The printer can include mixing and matching texts, pictures, bar codes, and logos in this speed quarantee. To assist in this output, the printer includes 2 brand-new detachable and interchangeable high-capacity hoppers that store up to 500 cards. Cards can be preloaded in the hoppers and if additional hoppers are needed, they are available.

The printer has a reversible encoding unit that allows versatility to print and encode the same side of a plastic card without flipping the card over. The same printer can print magnetic, smart contact and smart contactless encoded cards.

Here are the main printer specifications:

* Dual-sided printing
* Color and monochrome printing
* Printing throughput: 1000+ cards per hour in monochrome, 125+ cards per hour in color – full card surface
* Encoding of magnetic stripes, contact and contactless smart cards
* Supports Windows Vista and XP. MAC driver is available upon request

For additional information about the Evolis Quantum or other Evolis card printers, contact our ID card experts at 888-485-4696.

Zebra P330i – Using the Single Card Feeder


To set up the Zebra P330i printer for feeding single cards, follow the steps listed in the video.

First, the driver setting must be changed.
1. Empty the card feeder by removing the cards.

2. Use the eject command to remove the remaining id card in the printer.

a. Open the printer properties menu.
b. Select the device settings tab.
c. Go to the tools menu.
d. There are two eject card buttons to select from:

i. A button to eject the cards from the print engine.
ii. A button to eject the cards from the feeder and the print engine.

Second, insert the card into the slot under the feeder lid on the right side of the printer.

Third, the card will automatically be drawn into the printer with the print job is sent.

Find out specific information about Zebra Printer models:

Zebra P110i
Zebra P330i
Zebra P430i

For other Zebra printing tips see the following videos:

Zebra P330i – ID Card Printing Tips

Zebra P330i – Installing A Print Ribbon

Zebra P330i – Loading PVC Cards

Zebra P330i – Installing Printer Drivers

Zebra P330i – Installation Tips

Asure ID 2009 Software – Using SQL as the Native Database

Setting up Asure 2009 to use SQL as the Native database:

The first thing that needs to be done is have the SQL Database Administrator create a database instance for Asure 2009 to use. The security setting for the database needs to be set by the SQL Database Administrator. They need to grant full read/write privileges to the database instance.

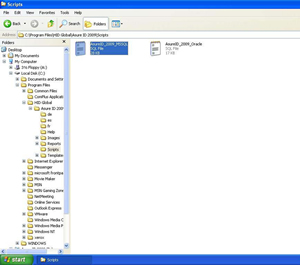
On that instance the SQL Database Administrator needs to run the table creation script. The script can be found at the location shown in the following screen shot:

Once the script has been run to create the tables Asure 2009 can now be connected to the database. Under the start menu, choose the “Data Connection Wizard” as shown below:

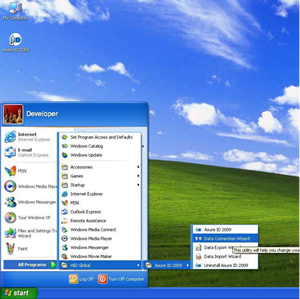
This will start the wizard to connect Asure 2009 to the SQL Database.

Below is the first screen for the wizard:

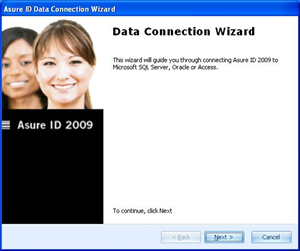
Click next to continue setting up the customer database configuration for Asure 2009.

The next screenshot is the wizard asking what type of custom database Asure 2009 will be connected to:

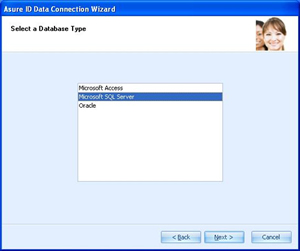
In this example choose “Microsoft SQL Server” and click “Next”.

The following screen shot is the actual set up screen of the wizard. This is the general data connect window for SQL Server:

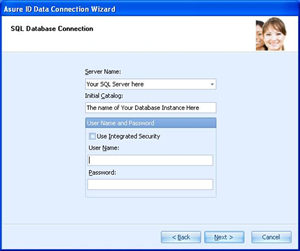
Under “Server Name” the name of the SQL Server needs to be entered. Then under “Initial Catalog” type in the name of the Database Instance that the SQL Database Administrator set up for Asure 2009 to use. The “User Name and Password” should be provided to you by your SQL Database Admin. These can either be specified user names and passwords or it can be set up to “Use Integrated Security”. This means that who ever logged on to the computer has access to the database.

Once it is all filled out, click “Next”.

The wizard is now complete.

You can click the “Test” button to test the connection to the SQL Database.

Once you have verified the connection click “OK”.

The following screen will be back up again:

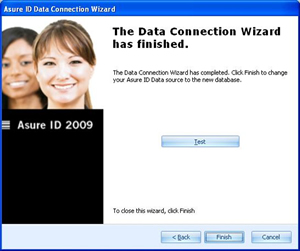
Click “Finish” to exit the wizard.
The log in for Asure 2009 now that it is connected to the SQL Database is:
User Name: admin
Password: admin

Safe-Card ID provides ID card printers and ID card software including Asure ID Software. Contact our ID card experts at 888-485-4696 for purchasing information.