
Following are the steps to install an Evolis USB printer on a Mac running OS X version 10.4 through version 10.11.
- Prior to starting the installation, make sure you have Administrator rights.
- Plug the printer into an open USB port on the Mac and power-on the printer.
- Ensure that cards and ribbon are loaded in the printer, and that only the power-light is illuminated following the power-up sequence.
- Go to the Evolis Drivers & Support page, then click through to your specific printer model from the available choices.
- Scroll down the printer-specific downloads page to locate the Mac OS X driver, and download it to your desktop. Run the setup installation and follow the instructions during the installation process.
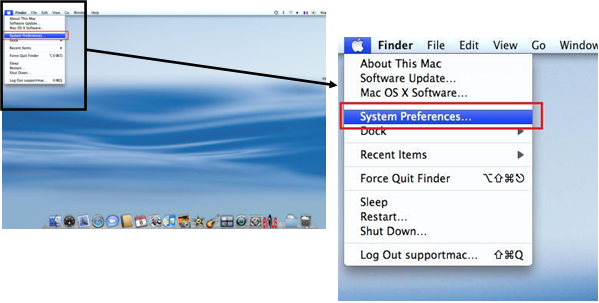
- Open the “Apple Menu”, then select System Preferences.
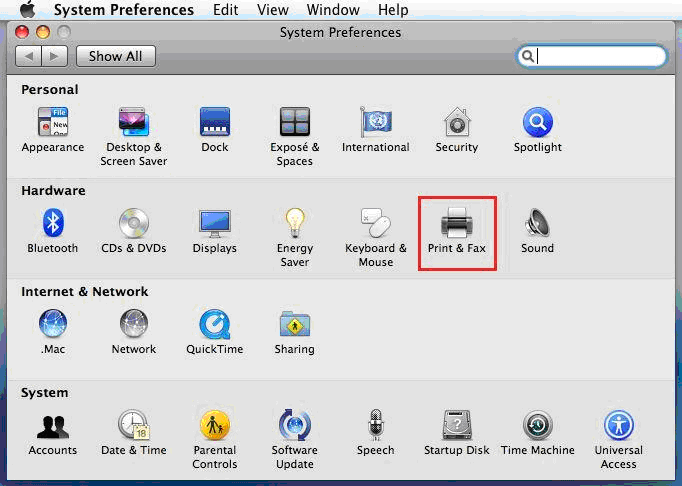
- Open Printers and Scanners.
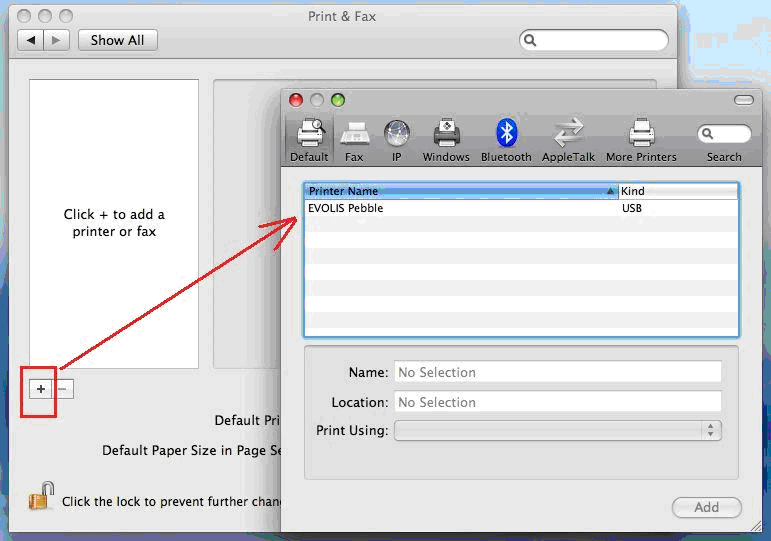
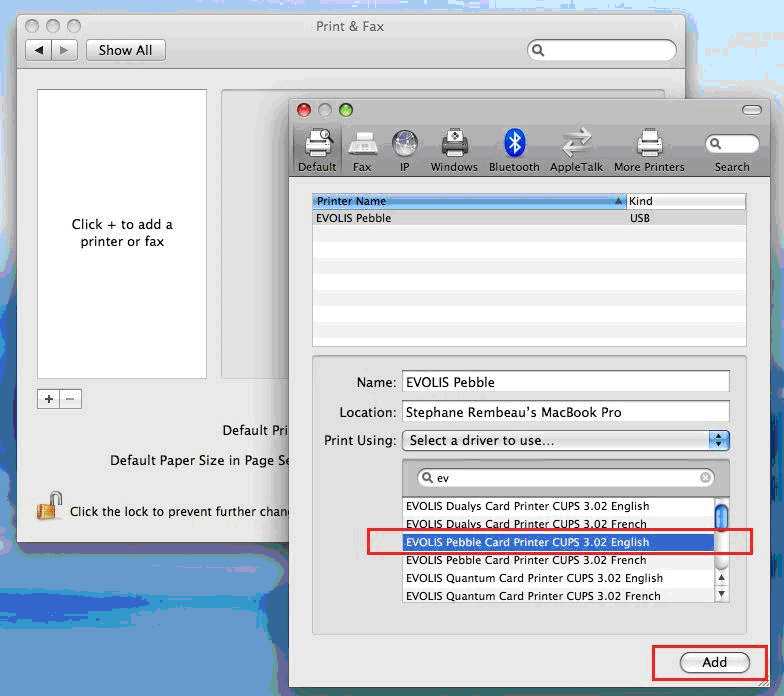
- Click on the + to add a printer. In the resultant pop-up window, your Evolis printer will already be detected and listed. Select the Evolis printer.
- In the “Use” box, choose “Select Software”
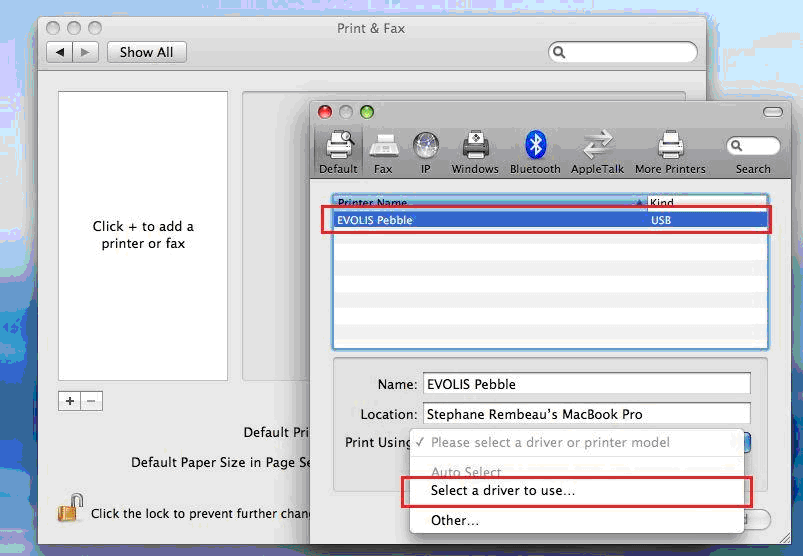
- In the drop-down menu, select the Evolis driver and the language you need, then click on “Add” to validate your choice.
- The driver is now ready to be used, and you are ready to begin printing cards.
Congratulations! You’ve now completed the steps required to install an Evolis USB printer on a Mac, and are ready to go!
Other tips:
In your badge-printing software, ensure that the correct driver is selected for the printer, and also check the paper-size settings. Badge creation programs will usually offer “CR80” or “Card” as a standard size. Go to Printer Features to access any Evolis print-driver properties and adjust as necessary.
Need more info?
For more information about Evolis printers, review our blog for other Evolis printer tips and support posts, or call our ID experts toll-free at +1 888.485.4696 (from US & Canada), or +1 704.535.5200 (from other locations)
as a mac user, i must say evolis printer helps me a lot in my projects or business.
thnks