Evolis Pebble Printer – How to Load Cards

The Evolis Pebble printers provide sharp, colorful custom ID cards. When installing the printer, it is important to know how to correctly place PVC cards into the card hopper. Following these instructions regarding the proper way to load cards into the Evolis Pebble card printer:

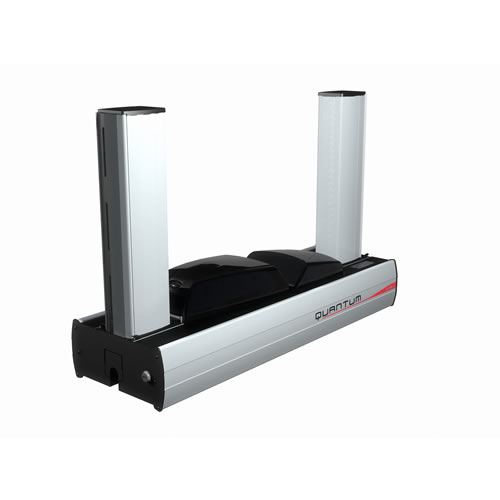
  1. Press on both sides of the feeder and detach it from the printer by lifting it up and out.
  2. Flip the feeder over to gain access to the lower part.
  3. Depress the plate and insert the cards Repeat the process until you have filled the feeder with the required number of cards.
  4. If required, adjust the gauge from right to left to match the thickness of the cards to be processed.
  5. Insert the feeder back into the printer, The feeder will be correctly positioned when you can hear a click when inserting it into the printer.

If you are interested in information about the Evolis Pebble printer or other Evolis printers available, contact our ID card experts at 888-485-4696.

Evolis Pebble Printer – How to Use the Manual Feeding Mode

If you have an Evolis Pebble and wish to use the manual feeding mode, you will find the steps to attaching the feeder in the following Evolis video.

1. Remove the printer feeder.

2. Use the gauge and adjust it to the “Max” position.

3. Insert the manual feeding tray. Then press on the top of the feeder until the feeder clicks audibly into its slot. Select the “manual feeder” from the “feeding source is” menu and choose the desired outcome mode.

4. Insert the cards in the printer.

If you are interested in information about the Evolis Pebble printer or other Evolis printers available, contact our ID card experts at 888-485-4696.

Magicard Printer – How to Clean the Printhead

Magicard printers provide printed identification cards for both small organization and large card printing needs, such as a government issued ID card or financial cards from banks. The embedded video provided by Magicard begins at the point of the cleaning process that shows how to clean the printer’s printhead.

This process is important to keep the internal printing mechanisms free from dirt, dust and oils that may reduce the quality of the card output.

Steps for Printhead Cleaning

1. The printhead needs cleaning when traces of ribbon or lines are seen on the printed cards.
2. Take the cleaning pen.
3. Open the printer and pass the cleaning pen across the length of the printhead.

For additional information about Magicard printer models or id badge printers, contact our ID card experts at 888-485-4696.

Evolis Tattoo 2 – How to Clean the Interior of the Printer

Following is an illustrated process to clean the interior of an Evolis Tattoo 2 ID card printer. This Evolis produced video will provide you with the steps needed to keep your printer running in peak condition.

1. Switch the printer power on and open the cover.

2. Remove the ribbon and close the cover.

3. Press on both sides of the feeder and detach it from the printer by lifitng it up and out.

4. Remove any cards located in the feeder.

5. Use a new cleaning card provided in your Evolis cleaning kit and place it in the feeder.

6. Press the control panel’s push button for one second.

7. The cleaning process will start.

8. As the card passes multiple times inside, it cleans the cards transport rollers, the cleaning rollers and the printhead as well.

9. The used card is then ejected into the output hopper.

10. Place the ribbon back into place and the cards back into the feeder.

If you are interested in information about the Evolis Tattoo 2 printer or other Evolis printers available, contact our ID card experts at 888-485-4696.

Visit the manufacturer website here.

Evolis Tattoo 2 – How to Clean the Printhead

Looking for information about how to clean a printhead of an ID card printer Following is a video released by Evolis illustrating how to clean the printhead with Evolis cleaning kit supplies.

1. Unplug the power cable to power off the printer. The white push button switches off.

2. Open the printer cover.

3. Use a cotton swab and press the center of the tube until it clicks releasing the cleaning product.

4. Gently apply the cotton swab onto the print head moving it from left to right for a few seconds.

5. Close the cover and wait a couple of minutes before using the printer letting the cleaning product dry.

6. Reconnect the power cable and power the printer on. The white push button switches on.

If you are interested in information about the Evolis Tattoo 2 printer or other Evolis printers available, contact our ID card experts at 888-485-4696.

The New Fargo DTC Printers

A breakthrough in direct to card printing, the Fargo DTC printer/encoders are illustrated in the following HID Global produced video. These new printers produce a fantastic ID card at an affordable price point.

[This video is no longer available, as this is not Fargo’s current line of printers. Thank you!]

Fargo DTC1000
Hassle free ribbon installation
Easy, plug and play printing
Easy to use Swift ID card application at no additional cost

Fargo DTC4000
Migrate to higher security
Moveable smart screen with on-board diagnostics
Enhanced security with UV printing
Optional same side input & output hoppers
Ugradeable encoding modules for added security

Fargo DTC4500
Maximum Security
Maximum Power
Optional single-sided lamination or dual sided, simultaneous lamination for maximum security
Print and encode inline via one USB or ethernet cable
A powerful printer for high volume printing.

For a free consultation with an ID card expert about these new Fargo printer models, contact our sales and service at 888-485-4696.
Experts in the new printer lineup: Fargo DTC1000, Fargo DTC4000 and Fargo DTC4500

Evolis Tattoo 2 – How to Clean the Cleaning Rollers

To make sharp looking personalized cards, it is important to keep your ID card printer in a clean environment. Even then, it is important to follow the manufacturer cleaning recommendations to keep your printer printing it’s best. Following is an Evolis video demonstrating how to clean the printer’s cleaning rollers.

1. Open the printer cover.

2. Remove the ribbon.

3. Locate the cleaning roller and remove it.

4. Use a cleaning wipe from your Evolis cleaning kit.

5. Remove any dust by gently rubbin the wipe across the roller surface.

6. Once the roller is clean and dry, place it back into the printer and make sure it is in the appropriate position.

7. Set the ribbon back in place and close the printer cover.

8. Remove the printer feeder.

9. Clean the roller with the wipe by gently rubbing it.

10. Reattach the feeder to the printer and push it until it clicks back into place.

11. The printer is now ready for printing.

If you are interested in information about the Evolis Tattoo 2 printer or other Evolis printers available, contact our ID card experts at 888-485-4696.

Visit the manufacturer website here.

Evolis Tattoo2 – How to Install a Print Ribbon

To print custom printed cards with an Evolis Tattoo 2 printer from Evolis, a print ribbon needs to be installed in the printer. Following you will find a list of steps to install a print ribbon in the Evolis Tattoo 2 printer. You will also find the steps in an Evolis produced video illustrating ribbon installation.

1. Open the printer cover.
2. Take a new ribbon and insert it inside the printer making sure it is properly positioned.
3. Close the printer cover.

The printer ribbon will automatically synchronize itself for card printing.

If you are interested in information about the Evolis Tattoo 2 printer or other Evolis printers available, contact our ID card experts at 888-485-4696.

Evolis Tattoo 2 – How to Use the Output Hopper

The Evolis Tattoo 2 printer is shipped with a detachable card hopper that will receive printed cards. Evolis has provided a video displaying how the output hopper is attached to the printer for use.

The hopper will accept 15 standard 30 ml PVC cards. It is attached by carefully lifting the front of the printer and placing the output hopper in place as shown in the video.

If you are interested in information about the Evolis Tattoo 2 printer or other Evolis printers available, contact our ID card experts at 888-485-4696.

Consider The Evolis Quantum Printer

The Evolis Quantum is a special ID card printer designed for running thousands of cards per week through a printer. This printer will hold up to the pressure of running for hours and hours at a time.

This card printer can provide personalization of PVC cards with a black monochrome ribbon. The printer can print a card holder name on a card in seconds. The printer is also capable of printing full color cards in one pass with custom personalization and encoding, if required, on the card.

This printer can accomplish the high volume print jobs easier than standard ID card printers. The amount of prints available in a single ribbon is much larger than in most badge printers. The print ribbons for the Evolis Quantum provide 3,000 prints per roll. This ribbon quantity keeps production moving as print ribbons do not need to be changed as frequently as printers that have a standard 200 to 500 count print ribbon.

Another feature allowing high volume printing is the card input and output hopper size. The Quantum card printer holds 500 cards in the input hopper and 500 cards in the output hopper. The hoppers are also exchangeable allowing you to preload additional input hoppers for easy transfer when it is time to replace cards in an empty hopper.

For more information about the Evolis Quantum or other Evolis printer models, contact our ID card experts at 888-485-4696.