Author Archives: Safe-Card ID Team

Installing and Setting up the Persona C30e

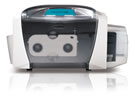
Guide to Persona C30e Printer Setup and Installation

While unpacking the printer, inspect the packaging to make sure that no damage has occurred during transit. The following items are included with the printer:

1. Power Supply
2. Power Cable
3. Software Installation CD/User Guide
4. User Guide
5. Warranty Statement and Registration Card

Connecting the Printer Power

1. Plug the AC adapter power cable into the back of the printer.
2. Plug the wall power cable into the AC power adapter.
3. Plug the wall power cable into a standard 110VAC power outlet.

Install the Ribbon Cartridge

1. Open the front Cover by pressing the black rubber pad and lowering the cover down.
2. Remove the liner on the card cleaning roller (there is a blue arrow on it) and remove the ribbon securing (this is a blue piece on the back of the cartridge).
3. Slide the ribbon cartridge into the printer.
4. Close the front cover and press the front cover’s black rubber pad until the front cover is securely closed.

Installing Blank Cards into the Card Hopper for Batch Mode Printing

1. Open the card hopper cover.
2. Press the card hopper load lever down until the card tray locks in place.
3. Load up to 100 cards into the hopper. Print side goes down.
4. Close the card hopper cover to release the card tray.

Lower the Card Output Hopper

Pull the output hopper down until it snaps into place.

Install the Print Driver

Close all programs and insert the software installation CD into your computer’s CD drive. The CD’s installer program will automatically open. Follow the CD’s on-screen procedures to complete the installation. During this installation, you will be directed to connect the USB cable and specify the ribbon that will be used.

Printing a Test Print Image

1. Go to your computer’s startup menu. Select Settings>Printers and Faxes or Printers.
2. Double click on the card printer under the printer’s window.
3. Select the printing preferences under the printer drop-down menu which will bring up the printing preferences window.
4. Select the card tab and click on the Test Print button. The image is copied to the printer.

For additional information about Persona C30e printers or photo ID card systems, contact our ID card experts at 888-485-4696.

ID Template Ideas

Many purchasers of ID card printer systems do well when setting up their system components. The problem they sometimes have is in developing the card layout in the design phase.

Prior to beginning the badge design in the ID card software, it is a good idea to determine the requirements of the badge.

Will the card need to be printed on the front and back?
Do you have good quality logos and other images needed for the badge?
What is required on the badge in terms of text, logos, bar codes, and pictures?

Following are a number of badge designs that may assist you in the design layout (Click on the image for an enlarged picture):

Sample ID Badge Sample ID Badge
Sample ID Badge ID Badge Sample
Sample ID Badge sample id badge

For additional information about photo id card printer systems or custom photo id cards, contact our id card experts at 888-485-4696.

Zebra P330i – Installing a Print Ribbon


Following are the directions to install a printer ribbon in the Zebra P330i printer:

1. Make sure that you will be installing a True Colors i series ribbon and it is recommended to leave the printer on during the printer ribbon installation.

2. Open the printer lid and push the blue release arrow forward.

3. Lift up the printhead carriage and remove the used ribbon.

4. Hold the ribbon spool in your right hand with the white end facing the printer. In your left hand, hold the empty spool. The tape should still be attached.

5. Make sure the ribbon feeds across the top of the spools.

6. Place the ribbon on the spindle located under the printhead carriage. Place the empty spool on the take up spindle to the left of the carriage.

7. Press the spools firmly onto the spindles.

8. Press down on the printhead carriage until it clicks into position.

9. The printer will automatically adjust the ribbon. If the ribbon was installed correctly the LCD display will display the word “ready”.

Find out specific information about Zebra Printer models:

Zebra P110i
Zebra P330i
Zebra P430i
Zebra P520i

For other Zebra printing tips see the following videos:

Zebra P330i – ID Card Printing Tips

Zebra P330i – Using the Single Card Feeder

Zebra P330i – Loading PVC Cards

Zebra P330i – Installing Printer Drivers

Zebra P330i – Installation Tips

Magicard HoloKote Video

This video from Magicard demonstrates the Magicard HoloKote tool available on Magicard ID card printers. The HoloKote tool provides a custom key for your HoloKote enabled card printer model.

The custom key is a memory card device. The key holds your custom HoloKote watermark logo and is also able to lock some models of the id card printers. The logos are in black and white. To create the HoloKote, you can upload your logo in any format and it will be converted into the correct image.


Zebra P120i Training Videos

The Zebra P120i is a quality dual sided printer that is easy to use. To make your installation, maintenance and production hassle free, the following videos are provided to provide details about the printer’s maintenance and care.

Adding Card Sense to the Zebra P120i printer
Steps to install the Zebra P120i printer

How to Install a Zebra P120i print driver
Loading ID cards into the Zebra P120i printer

Steps to Clean the Zebra P120i printer

Clearing a Card Jam in a Zebra P120i printer

Zebra P330i – Installing ID Card Printer Drivers


The printer driver for the Zebra P330i can be installing using the following steps:

1. Insert the Windows CD into the computer CD-Rom Drive. The Install Wizard will guide our installation on the computer.
2. After selecting “install print driver” from the main menu, the install shield wizard will install on the computer.
3. Click next to continue.
4. The select the features window will display. Select the install USB printers drivers button.
5. The license agreement will display. Click yes to continue installation.
6. The setup type window will display. Select the appropriate installation and click next.
7. The select program screen will display. Choose the default or folder of your choice.
8. The setup status window will display the progress of the installation.
9. The congratulations window will display. Click next.
10. You will have an option to read the read me files.
11. The install wizard complete screen will display. Click finish to restart the computer.

Find out specific information about Zebra Printer models:

Zebra P110i
Zebra P330i
Zebra P430i

For other Zebra printing tips see the following videos:

Zebra P330i – ID Card Printing Tips

Zebra P330i – Using the Single Card Feeder

Zebra P330i – Installing A Print Ribbon

Zebra P330i – Loading PVC Cards

Zebra P330i – Installation Tips

Zebra P330i – Loading PVC Cards


To load PVC cards into a Zebra P330i printer:

1. Open the lid card feeder locared on the right hand side of the printer.
2. Verify the card thickness guage is set up properly for your card thickness.
3. Open the cards. Remove the PVC cards from their wrapper and shuffle carefully while holding the sides of the cards.
4. Place the cards into the feeder. The top cards will lie at an angle.
5. Close the feeder lid.

Find out specific information about Zebra Printer models:

Zebra P110i
Zebra P330i
Zebra P430i
Zebra P520i

Zebra P330i – Installation Tips


When opening the Zebra P330i printer for the first time, you will find the following tips helpful:

1. Remove both of the reusable handles on the sides of the box.
2. Slide the top of the box up.
3. In the top tray of the styrofoam packing, you will find the following:

  • Driver
  • Cleaning Supplies
  • Quick Start Quide
  • Documentation CD
  • USB Cable
  • Power Supply
  • Cleaning Cartridge Assemby

4. Remove the top styrofoam piece.
5. Remove the yellow tape.
6. Push the blue release forward.
7. Lift up the printhead carriage.
8. Remove the printhead protector.

Find out specific information about Zebra Printer models:

Zebra P110i
Zebra P330i
Zebra P430i

For other Zebra printing tips see the following videos:

Zebra P330i – ID Card Printing Tips

Zebra P330i – Using the Single Card Feeder

Zebra P330i – Installing A Print Ribbon

Zebra P330i – Loading PVC Cards

Zebra P330i – Installing Printer Drivers

Zebra P120i – Clearing a Card Jam


It is recommended to not force a card jammed into the machine out, but to eject it automatically using the computer interface and the following steps.

1. Click on the computer start button.
2. Click on settings.
3. Open the printers directory.
4. Select the P120i printer and right click to open properties.
5. Select the device settings.
6. Select the tools menu.
7. Select properties.
8. Click on the eject card button on the bottom right hand corner of the screen.
9. The card will eject from the front of the printer.

Find out specific information about Zebra Printer models:

Zebra P110i
Zebra P330i
Zebra P430i
Zebra P520i

Zebra P120i – Loading ID Cards in the Printer


Steps to load PVC cards into a Zebra P120i printer:

1. Open the card feeder cover.
2. Slide the blue card guide up into place until it locks.
3. Place a stack of cards into the feeder.
4. Close the cover until it clicks.

Find out specific information about Zebra Printer models:

Zebra P110i
Zebra P330i
Zebra P430i
Zebra P520i