Category Archives: Safe-Card ID Tech Tips

How to Clean your Photo ID Card Printer

cleaning kit

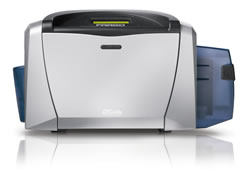
It is important to clean your id card printer for optimal performance. Although printers do not require an extreme amount of maintenance, the printers do need to reside in a clean area and have clean components for best printing results.

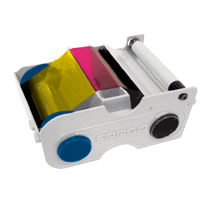
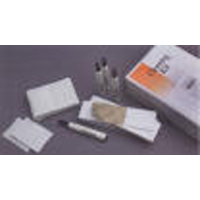
An easy way to maintain the printer is to obtain and use a cleaning kit that is manufactured for your specific printer. The correct cleaning kit contains cleaning swabs or pens, cleaning cards and cleaning pads that will not harm the components of the id card printer. By following the cleaning recommendations in the printer’s owner manual, the life of the printer will be extended and the manufacturer’s warranty requirements will be met.

Some printers will provide a prompt to clean the printer. Other printers have a manufacturer recommendation to clean the printer at each ribbon change. Follow the directions in the manufacturer’s printer manual to correctly clean the printer.

Find the manufacturer recommended id card printer cleaning kit in our shopping cart.

Printing Black Text on the Back of an ID Card

custom id

Many id card printers provided to groups and organizations are single sided id card printers. These printers are able to print single color or full color printing on one side of the card. Things go along smoothly for a while, and then someone from the organization decides that it would be nice to be able to make use of the back of the card since it is blank. Examples of things printed on the back of the card are company contact information, mission statements, organizational reference information or directions as to what to do if the card is lost and needs to be returned to the owner.

Many organizations use a simple process to print the needed information on the back of the card. In one of our earlier posts about dual sided id cards with a single sided printer, we explained that you could print the front side of the card and then flip the card over and print the back side of the card. Although that process will work, there is a smoother process if the information on the back of the card is always identical on each card. Here are the steps.

1. Purchase a black ribbon to use solely on the back of the card.
2. Design the card back in your id card software design program.
3. Install the black ribbon into the printer and verify the printer and software program are set up to print with a black ribbon.
4. Print the back side of the card for the number of badges needed.
5. Turn the printed cards and reposition them in the printer so that the front of the card can be printed.
6. Swap out the black print ribbon for a full color ribbon.
7. Print front side of the card with your design software and printer.

After checking the output hopper, you should find that the card has print on both the front and back side of the card which has been completed by your single side id card printer.

For additional hints and tips for your id card printing project, contact our experts toll free at 888-485-4696. We specialize in Fargo printers, Evolis printers, Magicard printers and CIM printers.

Connecting a Printer to the PC via a USB Cable

Fargo DTC400e

When installing a new id card printer, one of the first steps is to install the printer driver. The driver is located on the CD that is included with the printer.

When the driver is installed, an instructional window will advise you to connect the id card printer to the PC. To do this, locate the USB port on the printer. Connect the printer to the PC with the printer cable. Many printer models include a printer cable with the purchase of a printer.

To locate the USB port on the id card printer, look at the back of the printer. Some manufacturers place a piece of protective white tape over the USB port. The tape states that the ID card printer driver needs to be installed in the computer prior to plugging the printer cable into the port.

Once the printer and computer are connected correctly by the printer cable, communication can occur allowing the printer to begin printing the id badges needed.

For additional information about custom id cards and photo id card systems, contact our id card experts at 888-485-4696.

Smart Card Color Distortion

Proxcard II

When using smart cards in an ID card printer, there are times that the colors printed on the card do not turn out as expected. In a standard 30 ml card print, the colors are bright, crisp and consistent across the surface of the card. Sometimes smart cards show a variance in color leaving the printer operator wondering what happened during the printing of the card.

The occurrence is common. The variance produced is most likely due to microchip embedded in the card. The chip produces a bump in the card surface that prevents the color from printing evenly across the card surface. The composition of the microchip and accompanying antennas may affect the heat absorption as the printhead passes over the card during printing. The difference in heat may cause the resulting color difference.

Current Fargo printers that will allow encoding of proximity cards are the Fargo HDP5000, Fargo DTC550 and Fargo DTC400e. For information about cards that can be integrated with identification applications, visit our HID prox card page.

Tips to Incorporate Security in your ID Card Design

custom id

It is easy to duplicate a white card with a logo and name on it. There are additional security measures you may wish to consider when designing your id card for maximum security.

1. To begin the graphic design process, you may find it helpful to divide your card up into a grid. Place the larger and fixed elements into the card first and determine whether the card will be veritical or horizontal. Remember to leave a placeholder for the badge slot punch if there will be one on your cards.

2. Use color in your card. Avoid extremes. Dark colors are hard to read and light colors make the card look washed out. Bright colors work best with variance in color to distinguish different levels of access or achievement.

3. A colored photo of the cardholder as large as possible on the card increases the security of the card. A colored photo is more secure than a black and white picture. Although high resolution is important, a picture size that is too large will be combersome in some computers and id badge design programs.

4. Choose a good font or fonts that appeal to the reader and are in good taste. Too many fonts on the card are distracting. Often a sans serif font is recommended for the text.

5. You may wish to incorporate a hologram on the card. The hologram can be clear, a standard pattern or custom. The protective overlay makes it difficult for counterfeiters to reproduce.

6. If your budget allows for an advanced printer, you may wish to consider a printer that uses reverse image printing technology. The security level of these cards are greater than a standard direct-to-card print. With the additional benefits of a better quality print and durability of the cards, some organizations choose to go this route.

If you have additional questions about id card printing, contact our id card experts at 888-485-4696. We provide and service Asure Software, ID Flow Software, EpiSuite, Fargo printer models, Evolis printer models, CIM printer models and Magicard printer models.

Black Bar Codes – How to Print True Black Bar Codes on your ID Badge

It is important for the correct working of your bar code that it print in a true black setting. Sometimes this will happen automatically, but it is best to double check your printer preferences prior to printing to make sure that you will obtain the bar code output desired.

The following instructions will provide a printed bar code that will print true black. The bar code in the following example is for a bar code close to the bottom edge.

1. Go to your computer and go to the start button in the left hand corner. Go to SETTINGS. Then go to PRINTERS and FAXES.

2. Right click on the correct driver for your printer and select PRINTING PREFERENCES>

3. Find the K PANEL RESIN tab. Click on the DEFINED AREA box.

4. Select PRINT K ONLY at the bottom of your form.

5. Double check to make sure that the X and Y axis settings are set to zero.

6. The height and width settings are found above the axis settings. If you have a vertical card, set the height for 2.11″. If you have a horizontal card, set the height for .500″. The width for both cards should be set at 3.377″.

Looking at your id card software design, you should see a black rectangle at the bottom of the card where you, hopefully, want the bar code to be placed.

For more information about designing id cards with id card software , contact our id card experts. We provide id card systems with Fargo printers, Evolis printers, CIM printers or Magicard printers.

Calibrate a Ribbon Sensor – Fargo DTC400 – Persona C30 – Fargo DTC300

How to Calibrate a Ribbon Sensor for the Fargo DTC400 printers, the Persona C30 printers and the Fargo DTC300 series printers.

1. Go to the start button on the lower left corner of your computer screen.

2. Click on Printers and Faxes.

3. RIGHT click on your printer and select printing preferences.

4. At the top of the screen, select the tab that says calibrate.

5. Click on the button half way down on the right that says sensors.

6. Follow the directions on the screen.

For information about the Persona C30e , Fargo DTC400e or other Fargo printers, contact us for a free consultation at 888-485-4696.

Dual sided ID cards with a single sided card printer

custom id

In these days of a tightened economy, households and businesses alike are tightening their belts and purchasing necessary items, but leaving luxury items on the shelf. As well as dealing with tight financial budgets, companies are also needing to add layers of security within the organization to protect the business properties, it’s operations and it’s employees.

ID cards are a common security layer needed in the business and educational world. They are used for identification as well as more specialized functions of access and debiting a financial account. Organizations that need to purchase or replace an id card printer can reduce their card printer expense if they can manage with a single side printer rather than a dual sided printer.

Dual sided printers print the front of the id card in full color. The printer then flips the card inside the printer and completes a black print on the back of the card. The process is easy. If a company wishes to have printing on both sides of their id card, but does not have the funds for a dual sided printer, an option is available. A single side printer can be used to print the front side of the card. By using a YMCKO print ribbon, the printer will print a full color front side. The print ribbon can then be exchanged with a black ribbon. When the card is flipped and placed back in the printer, the card printer operator can choose to print the black back on the card. This process is a bit combersome, but will keep expenses under control.

To smooth out the process, many of our customers preprint the back of many cards at one time. They keep these “preprinted” cards clean and available for the customized printing on the front side as needed.

For additional hints and tips for your id card printing project, contact our experts toll free at 888-485-4696. We specialize in Fargo printers, Evolis printers, Magicard printers and CIM printers.

How to Repair a Broken Print Ribbon

print ribbon

If you are using the id card printer ribbon type that has two spools and the ribbon breaks during printing, do not do what many people do and throw the rest of the card printer ribbon away. It is possible to save most of the remaining prints left on the ribbon by following these instructions.

1. Remove the printer ribbon spools from the printer and stand them upright on their ends.
2. Pull some of the ribbon from the spool supplying the ribbon and line it up with the end of the ribbon from the spool taking used ribbon. You may need to trim the ribbon with sissors to line them up.
3. Tape the broken ends of the ribbon that you have matched together.
4. Roll the ribbons one time around so that the tape is wound inside the used ribbon spool and not visible.
5. Place the ribbon back into the printer following the manufacturers guidelines for placing print ribbons in your printer.
6. Turn the power to the printer off.
7. After a few moments, turn the printer power back on and begin your id card printing processes.

If you are using a printer cartridge from the newer id badge printers, such as the Fargo C30, follow the directions below.

1. Remove the printer cartridge from the printer.
2. Line up the broken ribbon ends.
2. Tape the right hand spool ribbon to the left hand spool with a piece of scotch tape.
3. Turn the take up spool on the left counter clockwise to wind up a few panels of the ribbon.
4. Reinsert the cartridge.
5. Turn the printer off.
6. After a few moments, turn the printer power back on. This will reset the ribbon to the proper color panel.

Visit our website for more information on id card printers. We provide the following printer lines: Fargo Printer, Evolis Printer, CIM Printer and Magicard Printer. Ideal id sofware, cameras and all accessories and supplies are available to make id card printing easy.

When Blue Graphics or Text Print Purple

id card printer

When designing an id card, a card designer will organize the card layout and colors to just the right specifications on the screen. The badge design is perfect and so the test card is printed. It is a great feeling when the sample card looks identical to the card shown on the screen.

Unfortunately, sometimes the two images are not identical. One common difference is in the color “blue.” The blue color sometimes converts to purple on the printed card.

The way to fix this is to change the color matching that you will find in the driver. To change this go to your computer. Click on start, then settings, then printers & faxes. Right click on the driver and select “printing preferences.” Go to the device options and change the color matching to “monitor.” Test this option. If it is still not the color desired, test other options available.

If adjusting the printer driver settings does not do the trick, you will need to adjust the RGB values of the source color. Change the blue to a lighter color of blue (on the monitor) which should print a more normal blue color on your badges.

Our blog contains additional tips for id card design and id card printing.

Our company provides free toll free technical support for id card printer systems and equipment purchased here at Safe-Card. If we can assist you further with your photo id card printer or your id card software, call us toll free at 888-485-4696.