Tag Archives: Print Ribbon

Evolis Tattoo2 – How to Install a Print Ribbon

To print custom printed cards with an Evolis Tattoo 2 printer from Evolis, a print ribbon needs to be installed in the printer. Following you will find a list of steps to install a print ribbon in the Evolis Tattoo 2 printer. You will also find the steps in an Evolis produced video illustrating ribbon installation.

1. Open the printer cover.
2. Take a new ribbon and insert it inside the printer making sure it is properly positioned.
3. Close the printer cover.

The printer ribbon will automatically synchronize itself for card printing.

If you are interested in information about the Evolis Tattoo 2 printer or other Evolis printers available, contact our ID card experts at 888-485-4696.

ID Card Printers – When the Print Ribbon Breaks

Datacard

It is frustrating to have gotten so far. You have designed the ID card layout and gotten all the approvals. You have obtained all of the custom information about each card, double checked the database of information and gotten the information imported into the ID card software. Pictures for each employee have been matched up with the data and you are ready to go with the print job. Then it happens, the print ribbon in the ID card printer breaks causing the print job to stop. What needs to be done now?

Printer ribbon breakage is a common and frustrating problem wihen trying to complete a badge printing job. It is important to remember that just because a printer ribbon breaks or gets jammed inside of the printer, it is not time to throw the ribbon away. Do not start with a new print ribbon until the old one is used up and ready for the trash. The ribbon that breaks can be rolled forward and cards can continue to be printed with the ribbon until it is used up.

Important tips to keep your printer ribbon from breaking are the following:

1. Keep your printer clean. All printers have cleaning kits designed especially for them. The kit contains cleaning accessories that assist in preventing card feed errors, keeps cards from slipping on dirty rollers and keeps the print head free of dirt that can also cause costly printhead repair.

2. If you have changed the printer driver settings recently, a broken ribbon will remind you to restore the printer driver setting to their original default settings.

3. Some printer models have ribbon sensor collaborations that can be performed through the printer driver. Check with your owners manual to see if this applies to your brand and printer model. If so, take the necessary steps to adjust as directed in your operators guide.

4. Sometimes the card design will cause a print ribbon to break. A card designed with color and information completely to the edge or over the edge of the card can cause ribbon breakage. This breakage can also occur with card designs that are very dark in color.

5. Remember that you can only print on a PVC card one time in full color. If you try to reprint over a card for the second time (on the same side of the card), you will not have clear printing results. This action can also cause a print ribbon to stick to the card as it passes through and break the ribbon.

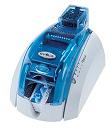
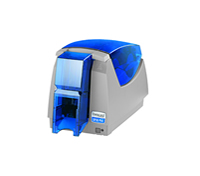
Safe-Card ID offers plastic ID card printers and ID card software. Toll free technicial help is available with every system purchased from Safe-Card ID.

Zebra P120i – Loading Print Ribbons in the Printer


To load print ribbon cartridges into the Zebra P120i printer:

1. Open the lid by pressing on the silver release button on top of the printer and lift the lid.
2. Remove the protective wrapper from the ribbon cartridge.
3. Remove the cardboard sleeve and peel off the blue tape on the cartridge.
4. The smart chip on the cartridge will match the contacts inside the printer.
5. Hold the cartridge parallel to the printer and slide the ribbon cartridge into the grooves.
6. Open the card hopper located in the front of the printer.
7. Press the lid closed until your hear it click.

Find out specific information about Zebra Printer models:

Zebra P110i
Zebra P330i
Zebra P430i
Zebra P520i

Evolis Dualys 3 Printer – Install a Print Ribbon

This video demonstrates how to install a print ribbon in the Evolis Dualys 3 ID card .

How to Install a Print Ribbon in the Evolis Dualys 3 ID Card Printer

1. Open the top cover.
2. Place the ribbon in the printer with the supply side to the right.
3. Close the top cover.

Safe-Card ID Services offers free phone support to our clients, so call 704-535-5200 to speak with one of our technicians.

Evolis Card Printers – How to Install a Print Ribbon

Pebble

When putting a new ribbon into your Evolis ID card printer, it is important to install the correct ribbon in the right format to make card printing easy.

Make sure that you have the correct ribbon for the card you will be printing. A full color single side print will require a YMCKO print ribbon. A full color dual sided card will need a YMCKOK print ribbon to print both front and back of the card in the single pass. The printer used must also be able to print dual sided cards.

First, gently pull the adhesive tape holding the ribbon off.

Open the printer cover and place the ribbon correctly into the ribbon spindle. Follow the pictured instructions on the printer to determine what spool goes into each spindle.

Close the printer lid. The ribbon will automatically synchronize and be ready to print a card.

For more information about Evolis ID card printers, visit our Evolis Tattoo, Evolis Pebble, Evolis Dualys, Evolis Quantum or Evolis Securion product pages. For a free consultation regarding what printer would be the best fit for your application, contact us toll free at 888-485-4696.